
Getting started with the PowerBasic compiler – Part 2
In this tutorial I will teach a few lessons about coding using the PowerBasic compiler by using a sample application I wrote which demonstrates a common error when writing desktop applications. This allows me to teach multiple lessons here. Often when we have an app which takes a long time to finish a task (ie. reading a data file, processing some data), we like to display some kind of visible progress status, using anything from a label (text) control to a progressbar. In essence a simple counter to tell the user how things are going.
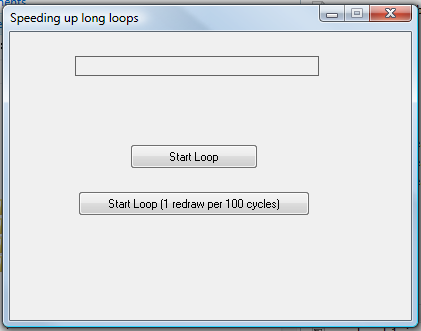
What we may not take into consideration is the effects of that visible status action on the entire tasks time of execution. If we update the status counter too frequently, there is little benefit to the user visibly, but the performance hit on the task may be significant. In this example, I have a form (dialog) with three controls on it, two button controls and one label (static) control like this:
Each button when clicked will run a simple loop of 200,000 iterations. In each cycle of the loop two things are done. First, something needs to take some time for the sake of demonstration, so I call a subroutine (procedure) which simply checks for pending window messages like this:
SUB DoEventAPI()
    LOCAL Msg AS tagMSG, T AS ASCIIZ*48, N&
    FOR N&=1 TO 1000
        IF PeekMessage(Msg,%NULL,0,0,%PM_REMOVE) THEN
           IF IsDialogMessage(Msg.hwnd, Msg)=0 THEN
               TranslateMessage Msg
               DispatchMessage Msg
           END IF
        END IF
    NEXT N&
END SUB
This subroutine is similar to a standard Windows message loop (not the FOR loop part though, but instead it would be in a DO LOOP and test for an exit), but instead is calls PeekMessage instead of GetMessage. Unlike GetMessage, PeekMessage returns immediately.
Next, in each cycle I want to display some kind of visible status to the user so they can see how many iterations have occurred so far. I use a Label control, but it could be something else like a progressbar and the affect would be similiar. Here is the main Loop iteration code:
SUB DoLoopUpdate(BYVAL Mode&)
    LOCAL N&, TM#, LN&
    CONTROL DISABLE hForm1&, %FORM1_BUTTON1
    CONTROL DISABLE hForm1&, %FORM1_BUTTON2
    LN&=200000
    TM#=TIMER
    IF Mode&=0 THEN
        FOR N&=1 TO LN&
            CONTROL SET TEXT hForm1&,  %FORM1_LABEL1, STR$(N&)
            DoEventAPI
        NEXT N&
    ELSE
        FOR N&=1 TO LN&
            IF (N& MOD 100)=0 THEN
                CONTROL SET TEXT hForm1&,  %FORM1_LABEL1, STR$(N&)
            END IF
            DoEventAPI
        NEXT N&
    END IF
    MSGBOX STR$(TIMER-TM#)+" seconds to run"+STR$(LN&)+" cycle loop"
    CONTROL ENABLE hForm1&, %FORM1_BUTTON1
    CONTROL ENABLE hForm1&, %FORM1_BUTTON2
END SUB
You can see that it cycles 200,000 times, with each cycle calling a routine which cycles 1000 times calling the PeekMessage code (for a total of 200,000,000 times). I set the text of the Label control with the counter value of the FOR NEXT loop (counts from 1 to 200,000) so the user sees it visibly count. The routine though handles the status display in two ways (1) show every iteration of the counter (2) show the counter iteration only every 100 cycles.
What we often fail to appreciate when creating such visible status counters is the actual time it takes to update the status control and for Windows to repaint it. Simply put, it takes time to draw pixels on the screen. When our task iterates thousands of times, this visible update may add significantly to the time it takes for the whole task. In this case, my task is to call the PeekMessage code 200 million times (200,000 cycles with each cycle calling PeekMessage 1000 times). That is a lot of work being done. But what affect will our status counter have ? It is only a Label control.
On a typical mass market PC (not your typical development PC), the entire tasks takes about 25 seconds. But when you update the status control (Label) only 1 time in every 100 cycles, the time is reduced to only about 5 seconds. The effect to the end user is nill. The counter still speeds by very fast. That is a 500% increase in performance though. And how hard was it to impliment this ? I simply added an IF THEN statement using the MOD function to test for every 100th cycle. Just a little code improves performance 500%.
Lesson 1: Minimize the time spent displaying a status control for long running tasks
Now let’s look at the entire applications code and see we what we can learn about coding using the PowerBasic compiler : (download the source code and compiled app)
#COMPILE EXE
#RESOURCE "myapp.pbr"
#REGISTER NONE
#DIM ALL          '  This is helpful to prevent errors in coding
#INCLUDE "win32api.inc"   ' Must come first before other include files !
' *************************************************************
'                  Constants and Declares (#1)
' *************************************************************
%FORM1_LABEL1             = 100
%FORM1_BUTTON1            = 105
%FORM1_BUTTON2            = 110
' *************************************************************
'               Application Globals Variables (#2)
' *************************************************************
GLOBAL hForm1&    ' Dialog handle
' *************************************************************
'                    Application Entrance
' *************************************************************
FUNCTION PBMAIN
    LOCAL Count&
    hForm1&=-1
    ShowDialog_Form1 0
    DO
        DIALOG DOEVENTS TO Count&
    LOOP UNTIL Count&=0
END FUNCTION
' *************************************************************
'                    Application Dialogs (#3)
' *************************************************************
SUB ShowDialog_Form1(BYVAL hParent&)
    LOCAL Style&, ExStyle&
    Style& = %WS_POPUP OR %DS_MODALFRAME OR %WS_CAPTION OR %WS_MINIMIZEBOX OR %WS_SYSMENU OR %DS_CENTER
    ExStyle& = 0
    DIALOG NEW hParent&, "Speeding up long loops", 0, 0,  267,  177, Style&, ExStyle& TO hForm1&
    CONTROL ADD LABEL, hForm1&,  %FORM1_LABEL1,  "", 43, 15, 163, 12, _
        %WS_CHILD OR %WS_VISIBLE OR %SS_CENTER OR %WS_BORDER
    CONTROL ADD "Button", hForm1&,  %FORM1_BUTTON1,  "Start Loop", 80, 69, 85, 15, _
        %WS_CHILD OR %WS_VISIBLE OR %BS_PUSHBUTTON OR %WS_TABSTOP CALL CBF_FORM1_BUTTON1
    CONTROL ADD "Button", hForm1&,  %FORM1_BUTTON2,  "Start Loop (1 redraw per 100 cycles)", 45, 98, 155, 15, _
        %WS_CHILD OR %WS_VISIBLE OR %BS_PUSHBUTTON OR %WS_TABSTOP CALL CBF_FORM1_BUTTON2
    DIALOG SHOW MODELESS hForm1& , CALL Form1_DLGPROC
END SUB
' *************************************************************
'                             Dialog Callback Procedure
'                             for Form Form1
'                             uses Global Handle - hForm1&
' *************************************************************
CALLBACK FUNCTION Form1_DLGPROC
    SELECT CASE CBMSG
        CASE %WM_DESTROY
             hForm1&=0
        CASE ELSE
    END SELECT
END FUNCTION
' ------------------------------------------------
CALLBACK FUNCTION CBF_FORM1_BUTTON1
     IF CBMSG=%WM_COMMAND THEN
         IF CBCTLMSG=%BN_CLICKED THEN
             DoLoopUpdate 0
         END IF
     END IF
END FUNCTION
' ------------------------------------------------
CALLBACK FUNCTION CBF_FORM1_BUTTON2
     IF CBMSG=%WM_COMMAND THEN
         IF CBCTLMSG=%BN_CLICKED THEN
             DoLoopUpdate 1
         END IF
     END IF
END FUNCTION
' ------------------------------------------------
SUB DoEventAPI()
    LOCAL Msg AS tagMSG, T AS ASCIIZ*48, N&
    FOR N&=1 TO 1000
        IF PeekMessage(Msg,%NULL,0,0,%PM_REMOVE) THEN
           IF IsDialogMessage(Msg.hwnd, Msg)=0 THEN
               TranslateMessage Msg
               DispatchMessage Msg
           END IF
        END IF
    NEXT N&
END SUB
'
SUB DoLoopUpdate(BYVAL Mode&)
    LOCAL N&, TM#, LN&
    CONTROL DISABLE hForm1&, %FORM1_BUTTON1
    CONTROL DISABLE hForm1&, %FORM1_BUTTON2
    LN&=200000
    TM#=TIMER
    IF Mode&=0 THEN
        FOR N&=1 TO LN&
            CONTROL SET TEXT hForm1&,  %FORM1_LABEL1, STR$(N&)
            DoEventAPI
        NEXT N&
    ELSE
        FOR N&=1 TO LN&
            IF (N& MOD 100)=0 THEN
                CONTROL SET TEXT hForm1&,  %FORM1_LABEL1, STR$(N&)
            END IF
            DoEventAPI
        NEXT N&
    END IF
    MSGBOX STR$(TIMER-TM#)+" seconds to run"+STR$(LN&)+" cycle loop"
    CONTROL ENABLE hForm1&, %FORM1_BUTTON1
    CONTROL ENABLE hForm1&, %FORM1_BUTTON2
END SUB
Let’s look at key parts of the code to see what we can learn:
#COMPILE EXE
#RESOURCE "myapp.pbr"
#REGISTER NONE
#DIM ALL          '  This is helpful to prevent errors in coding
#INCLUDE "win32api.inc"   ' Must come first before other include files !
The beginning code tells the compiler to compile the code to an EXE (#COMPILE), to use a precompiled resource file (which I put an icon and an XML manifest for Themes) (#RESOURCE), turn off the default Automatic use of Register variables in subroutines/functions (#REGISTER) just in case I want full control of using Register variables myself, force the requirement that all variables must be declared in code (#DIM ALL) (which I find is the best way to code) and finally the WIN32 API header files are included (#INCLUDE) since I make reference to the API functions (ie. PeekMessage). All of these are compiler directives, rather than BASIC commands. PowerBasic supports a number of compiler directives, including conditional compilation directives.
Next, we need some place for the application to start execution and in PowerBasic it can be done in two different ways. First, you can define a standard WinMain procedure, just like you do in C. The alternate way is to use the PowerBasic built in function called PBMAIN. Either way is acceptable. In this case, I use the PBMAIN syntax like this:
FUNCTION PBMAIN
    LOCAL Count&
    hForm1&=-1
    ShowDialog_Form1 0
    DO
        DIALOG DOEVENTS TO Count&
    LOOP UNTIL Count&=0
END FUNCTION
In the above code, I define a local variable for a counter (LOCAL) called Count&, which I use later in the DO LOOP. PowerBasic allows you to define variables as Global, Static (local but maintains value) or Local. The code calls a routine I created (ShowDialog_Form1) which is where I define my dialog, then executes a standard DDT (PowerBasic’s Dynamic Dialog Tools command set) event (or message loop). You can use a standard WIN32 message loop here, but PowerBasic provides a simpler way using the DIALOG DOEVENTS command. When the counter (Count&) equals zero, no more dialogs exist so the Loop ends and the app terminates when the PBMAIN function ends. So you now see where your app begins and ends. You can also define code outside of PBMAIN and any other SUBS/FUNCTIONS you may have, but only certain code is allowed there. Things like Global variables, constants, compiler directives and subroutine declares (including declares to external DLL subroutines) are the only code you can have outside of PBMAIN and other procedures in your application. In this case, I also define some constants, which I use for the control ID’s and one global variable for storing the handle to the dialog (which I need later) before PBMAIN like this:
%FORM1_LABEL1             = 100
%FORM1_BUTTON1            = 105
%FORM1_BUTTON2            = 110
' *************************************************************
'               Application Globals Variables (#2)
' *************************************************************
GLOBAL hForm1&    ' Dialog handle
Constants start with the % character. If the constant is a string it will start with the $ character. While I declare my Global variable using the old style data type character (&) familiar to BASIC programmers, PowerBasic also allows you to define variables without them like this:
GLOBAL hForm1 AS LONG
Now let’s look at the code to define the Dialog (aka. Form or Window) and its controls:
SUB ShowDialog_Form1(BYVAL hParent&)
    LOCAL Style&, ExStyle&
    Style& = %WS_POPUP OR %DS_MODALFRAME OR %WS_CAPTION OR %WS_MINIMIZEBOX OR %WS_SYSMENU OR %DS_CENTER
    ExStyle& = 0
    DIALOG NEW hParent&, "Speeding up long loops", 0, 0,  267,  177, Style&, ExStyle& TO hForm1&
    CONTROL ADD LABEL, hForm1&,  %FORM1_LABEL1,  "", 43, 15, 163, 12, _
        %WS_CHILD OR %WS_VISIBLE OR %SS_CENTER OR %WS_BORDER
    CONTROL ADD "Button", hForm1&,  %FORM1_BUTTON1,  "Start Loop", 80, 69, 85, 15, _
        %WS_CHILD OR %WS_VISIBLE OR %BS_PUSHBUTTON OR %WS_TABSTOP CALL CBF_FORM1_BUTTON1
    CONTROL ADD "Button", hForm1&,  %FORM1_BUTTON2,  "Start Loop (1 redraw per 100 cycles)", 45, 98, 155, 15, _
        %WS_CHILD OR %WS_VISIBLE OR %BS_PUSHBUTTON OR %WS_TABSTOP CALL CBF_FORM1_BUTTON2
    DIALOG SHOW MODELESS hForm1& , CALL Form1_DLGPROC
END SUB
In this subroutine there are three key commands used, DIALOG NEW where I define the Dialog, CONTROL ADD where I add (or create) controls and DIALOG SHOW where I show or display the Dialog. Notice that CONTROL ADD and DIALOG SHOW allow you to define callback functions. In essence you are passing a pointer to those functions when you add the CALL keyword to the end of those commands. The Dialog’s callback function is basically the same thing as a WIN32 Dialog Procedure. The only difference is that rather than having parameters to it, PowerBasic pushes the values of the standard Dialog Procedure parameters into system variables which can be used in your dialog procedure. It looks like this:
CALLBACK FUNCTION Form1_DLGPROC
    SELECT CASE CBMSG
        CASE %WM_DESTROY
             hForm1&=0
        CASE ELSE
    END SELECT
END FUNCTION
The parameters of a WIN32 Dialog procedure are, hwndDlg which is the Dialogs handle, uMsg which is the current Window message and the wParam and lParam parameters which contain values specific to the window message.
The PowerBasic DDT Dialog callback puts those parameters in these system variables :
CBHNDL
CBMSG
CBWPARAM
CBLPARAM
Later versions of PowerBasic change the syntax of these system callback variables to (with a dot):
CB.HNDL
CB.MSG
CB.WPARAM
CB.LPARAM
Now the controls can have callbacks too, but they don’t emulate a standard WIN32 coding syntax, but instead are unique to PowerBasics DDT command set. PowerBasic’s DDT engine (runtime code embedded by compiler) does a little trick with dialog procedures. Unlike WIN32 Dialogs where it calls back directly to your dialog procedure, PowerBasic’s DDT Dialogs first call back to an internal dialog procedure in the runtime code, where the runtime code can preprocess things. For Dialogs, it then forwards the window messages to your codes Dialog procedure. But for controls, it preprocesses two window messages, WM_COMMAND and WM_NOTIFY and then calls back to the controls callback (which it can calculate from those notification messages) routine putting some extra data into other system callback variables. DDT does a minimal amount of preprocessing of those messages to provide a little extra information, which you don’t have to calculate yourself. Here are the two control callback functions in my app, where I use the old style syntax for the callback system variables:
CALLBACK FUNCTION CBF_FORM1_BUTTON1
     IF CBMSG=%WM_COMMAND THEN
         IF CBCTLMSG=%BN_CLICKED THEN
             DoLoopUpdate 0
         END IF
     END IF
END FUNCTION
'
CALLBACK FUNCTION CBF_FORM1_BUTTON2
     IF CBMSG=%WM_COMMAND THEN
         IF CBCTLMSG=%BN_CLICKED THEN
             DoLoopUpdate 1
         END IF
     END IF
END FUNCTION
As you can see, it is easy to test for a button click in these callback routines. I first test the system variable CBMSG to see if the event was generated by the WM_COMMAND message to the Dialog or the WM_NOTIFY message. Then I test the CBCTLMSG system variable, which the DDT engine calculates from the high order word from the wParam parameter of WM_COMMAND. You don’t have to understand this, but simply that DDT calculates it for you and puts the controls WM_COMMAND notification message value in the system variable CBCTLMSG.
So, this is just a start in understanding how to write WIN32 applications using PowerBasic. To summarize, we discuss where your app starts and ends, how to handle message (event) processing, dialog and control callback functions, how to create dialogs and controls and things like compiler directives, variables and subroutines and functions.
Stay tuned for the next tutorial in this series.